Regulators on an air compressor – what they do and how to adjust it – are often misunderstood. Additionally, adjusting an air compressor regulator is one of the easiest tweaks you can make. Let Tool Tally clear up the confusion!
See Related: Do I Need A Regulator On My Air Compressor?
What function does an air compressor regulator have?
Simply put, the pressure regulator controls the amount of pressure (PSI) that is on the output of the compressor to your air hose. The compressed air stored in the tank may have a higher pressure than what is required for the particular power tool that you are attempting to use. This is what makes proper use of a regulator a critical function of any air compressor.
What is the difference between the regulator and the pressure cut-in switch?
The air compressor pressure switch is used to protect the components of the compressor. It detects the air compressor pressure of the air being stored in the tank and will automatically shut the compressor pump off at a preset maximum pressure setting to avoid it from getting too high (cut out pressures).
The pressure switch is also what signals the compressor to kick on when the pressure drops too low (cut-in pressure). We have a separate post about setting the pressure switch.
While most pressure switches don’t need to be adjusted from the factory setting, sometimes you will want to adjust the set screw to get a new pressure differential or to save money on your electricity bill if you have low-pressure needs.
The pressure regulator is different in that it controls how much pressure is flowing from the compressor tank to your hand tools through the air-line. It keeps you from using a pressure that is so high that it ruins your tool.
Importance of matching the PSI to the correct tool
The Pounds Per Square Inch (PSI) rating for an air tool is a primary requirement (along with CFM) to ensure that the tool is working as it was intended. For example, if you are using a staple gun with a 90 PSI requirement and you are only supplying 70 PSI, the tool will not be as effective. It will most likely not drive the staple in as far as it should.
In addition, too much pressure can be detrimental as well but in a different way. Using our staple gun example again, the staples may be driven incorrectly but too much pressure can actually damage the components of the air tool itself.
On a side note, there are some cases where low pressure is actually a benefit. Lower pressure means less resistance for air to move, therefore the rate at which it flows (CFM) can increase. This approach works well for applications such as paint sprayers.
Importance of matching the PSI to the correct tool
The Pounds Per Square Inch (PSI) rating for an air tool is a primary requirement (along with CFM) to ensure that the tool is working as it was intended. For example, if you are using a staple gun with a 90 PSI requirement and you are only supplying 70 PSI, the tool will not be as effective. It will most likely not drive the staple in as far as it should.
In addition, too much pressure can be detrimental as well but in a different way. Using our staple gun example again, the staples may be driven in correctly but too much pressure can actually damage the components of the air tool itself.
On a side note, there are some cases where low pressure is actually a benefit. Lower pressure means less resistance for air to move, therefore the rate at which it flows (CFM) can increase. This approach works well for applications such as paint sprayers.
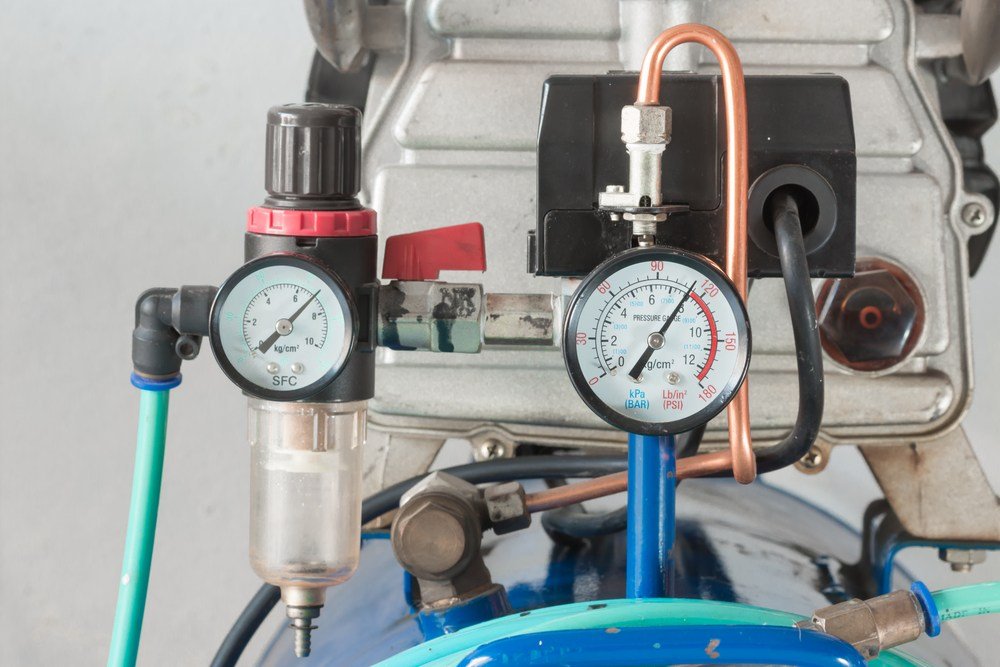
How a regulator works
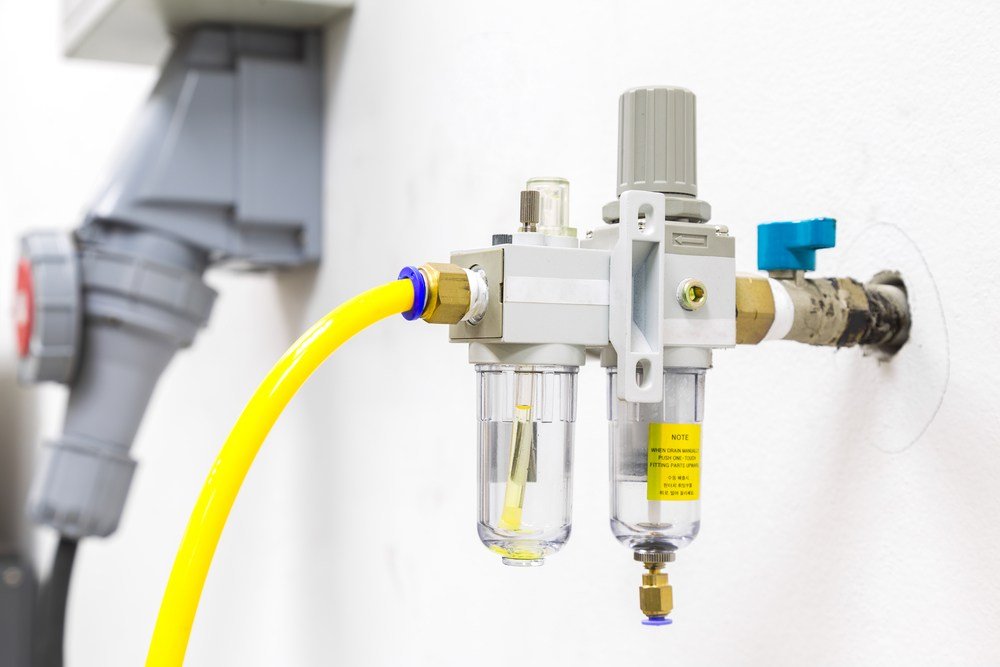
Most regulators you may see are outfitted with a regulator knob (either a T-handle or a knob), the regulator body, and a pressure gage. The control method actuates a valve inside the regulator body, therefore either increasing or decreasing the pressure of the air delivered to your air tool.
Steps to adjust a regulator
On a portable air compressor, the regulator will be part of the unit. Some of the larger industrial compressors will have a separate regulator that controls the pressure, has a water trap, air dryer, and takes a little bit of air compressor oil to keep your tools lubed while you use them.
The adjustment for either system is very similar.
1. To adjust the pressure output of your compressor, the first thing you need to do is to turn your compressor on and let it fill completely.
2. Look at the pressure gauge for the tank itself. This will tell you how much air compressor pressure you have in reserve. It should be higher than the recommended PSI for the tool that you are planning to use.
3. From there, connect your air hose and tool and look at the pressure gauge on the air regulator itself. If it is not at the right PSI setting, here is where you adjust, or “regulate”, the air pressure going to the tool.
4. Most regulators have a circular knob to adjust the pressure, and it is very common for these knobs to have a locking feature (pull out to unlock, push in to lock). To raise the pressure going to the air hose, unlock the knob and turn clockwise. You will be able to see the pressure increase by keeping an eye on the gage. To lower the pressure, go in reverse and turn counterclockwise. Don’t forget to push the knob in to lock it in place when you’re done!
Following the air tool manufacturer’s PSI recommendations by setting the air regulator properly is the best thing you can do to keep your power tools operating at top performance and ensuring long tool life.

Zachary Drumm
Hey! My name is Zachary Drumm! This site allows me to test new tools, piddle around in the garage, and share the insights I get from flipping cars and houses. When it comes to tools, home improvement, and being a “shade tree mechanic,” you’ve come to the right spot. If I’m not in the garage creating content, you’ll find me outside, running, canoeing, and traveling. My goal is to empower more people to be self-sufficient.